
A baby shower dessert table can be forgettable or unforgettable—and it all depends on how you style it! You’re not simply decorating a table with sweets; you’re styling a whole experience that celebrates the mom-to-be with every bite-sized piece.
From the themed inspiration down to the eye-level vertical elements, what makes a pro versus amateur looking dessert table?
Takeaways
- Choose a cohesive color palette of three harmonious hues that reflects the mom-to-be’s personal style and preferences.
- Create visual interest by varying heights using stands, boxes, and risers with the statement cake positioned as the focal point.
- Select a backdrop that commands attention, such as a floral wall or elegant drapery, and use strategic lighting to enhance aesthetics.
- Curate a diverse dessert mix with varied textures and bite-sized portions that balance rich and light options for all guests.
- Add personalized touches like custom signage, monogrammed napkins, and meaningful heirloom items to create a memorable display.
Choosing a Theme That Reflects the Mom-to-Be’s Style

When designing the most beautiful dessert table, start with a theme that reflects the mom’s aesthetic. Consider what the mom’s aesthetic is—does she like it soft and romantic, bold and modern, or maybe even a little whimsical?
Select her favorite color first, then add layers of depth by selecting complementary colors. If she likes dusty rose, add champagne gold and ivory for visual interest. Maybe she likes lush greens—add some brass and creamy neutral tones.
Creating this table isn’t just about the desserts; it is a way to tell a beautiful story of her journey to becoming a mother. Make sure to research and interview her friends, look through her social media for clues, and find out what she loves.
With all this preparation, you can create a breathtaking table display that the mom will be enamored by!
Selecting a Cohesive Color Palette for Maximum Impact

Although your theme establishes the foundation, your color palette delivers the visual drama that transforms an ordinary dessert table into a showstopping centerpiece.
You’ll want to harness color psychology to evoke the precise emotional response you’re seeking—soft blush and sage whisper tenderness, while bold jewel tones command attention and celebrate the momentous occasion ahead.
Consider seasonal palettes that honor the time of year your little one will arrive.
Winter babies deserve rich burgundies and champagne golds, while spring welcomes soft lavenders paired with creamy ivory.
Summer calls for coral and peach, and autumn embraces terracotta with dusty rose.
Limit yourself to three harmonious hues: a dominant shade covering sixty percent of your display, a secondary accent at thirty percent, and a striking pop color for the remaining ten.
This intentional restraint creates sophistication that feels curated, not chaotic.
Picking the Perfect Backdrop and Table Setup

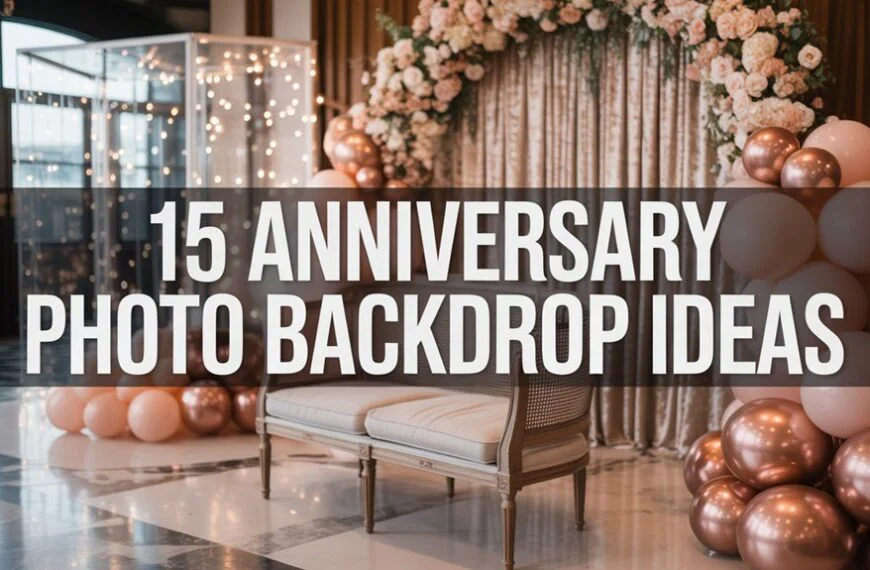
Your dessert table’s visual impact begins with selecting a backdrop style that commands attention—whether you choose a cascading floral wall, shimmering drapery, or an ornate vintage frame arrangement.
You’ll want to contemplate your table’s height and dimensions carefully, as these proportions determine how dramatically your confections will be displayed and whether guests can admire every meticulously placed detail.
Once you’ve established these foundational elements, you can layer coordinating colors and textures that create a sumptuous, cohesive tableau worthy of the celebration.
Choosing Your Backdrop Style
A striking backdrop transforms your dessert table from a simple display into a mesmerizing focal point that commands attention the moment guests enter the room. Your selection of backdrop materials sets the entire aesthetic tone—consider lush velvet draping, cascading florals, or shimmering sequin panels that catch the light beautifully.
| Backdrop Style | Perfect For |
|---|---|
| Balloon Garland | Whimsical, playful celebrations |
| Fabric Draping | Romantic, elegant affairs |
| Floral Wall | Garden-inspired luxury |
Strategic backdrop lighting elevates your design dramatically. Position soft uplights behind sheer fabrics to create an ethereal glow, or weave delicate fairy lights through greenery for intimate warmth. You’ll want shadows to dance gently across your confections, drawing guests closer to admire every exquisite detail you’ve curated with such devotion.
Table Height and Dimensions
Three essential measurements determine whether your dessert table achieves stunning visual impact or falls disappointingly flat: height, depth, and width must work in perfect harmony with your chosen backdrop.
Your table dimensions should span approximately six to eight feet for intimate gatherings, allowing guests to admire each confection without crowding.
Height considerations prove equally vital—standard thirty-inch tables create comfortable serving access, while thirty-six-inch cocktail heights add dramatic sophistication.
You’ll want your backdrop to rise eighteen to twenty-four inches above your tallest centerpiece, framing the display like a masterwork.
Consider depth carefully: twenty-four to thirty inches provides ample staging room for tiered stands, cake pedestals, and artfully arranged treats.
This calculated approach transforms ordinary presentations into breathtaking tablescapes that whisper elegance and draw your guests irresistibly closer.
Coordinating Colors and Textures
Your backdrop isn’t merely decoration—it’s the canvas upon which your desserts become edible art.
Each surface purposefully chosen to complement your confectionery masterpieces.
Creating Visual Interest With Varying Heights and Layers

When you’re designing a dessert table that captivates, height variation becomes your most powerful tool for commanding attention.
You’ll want to orchestrate a symphony of levels—crystal cake stands ascending like architectural columns, vintage boxes draped in silk, and marble risers creating dramatic pedestals for your confections.
Your layered displays should unfold like a visual story, drawing guests’ eyes upward and across the tablescape. Position your statement cake at the apex, then cascade down through tiered macarons, petite fours, and delicate truffles. Each level creates intimate moments of discovery.
Consider mixing materials—gilded frames propped behind desserts, stacked books wrapped in coordinating fabrics, or ornate mirrors reflecting light through crystalline serving pieces.
You’re not simply arranging sweets; you’re crafting an experience. The height variations guide your guests through a curated journey, transforming ordinary confections into an unforgettable theatrical presentation worthy of celebration.
Curating a Delicious Mix of Desserts and Sweet Treats

Beyond the architectural drama of your display, the desserts themselves must deliver an equally stunning performance. Your dessert variety should tell a cohesive story—think delicate macarons in soft pastels, miniature cheesecakes crowned with edible flowers, and chocolate truffles dusted with gold leaf.
You’ll want to take flavor balance carefully into account. Pair rich, decadent options like salted caramel tarts with lighter offerings such as lemon curd cups or fresh berry parfaits. This thoughtful contrast guarantees every guest discovers something irresistible.
Include bite-sized portions that invite guests to sample freely without commitment. Cake pops, petit fours, and decorated sugar cookies create an intimate grazing experience.
Don’t overlook texture—incorporate creamy mousses alongside crisp biscotti and pillowy meringues.
Reflect on your guest of honor’s cravings and dietary needs. Thoughtfully placed gluten-free or vegan selections demonstrate care. Each confection becomes a small gift, transforming your table into an unforgettable celebration of sweetness and anticipation.
Incorporating Decorative Elements and Props

While your desserts command center stage, the decorative elements surrounding them elevate your table from beautiful to breathtaking. You’ll want to curate table centerpieces that echo your theme without overwhelming your confections. Consider gilded frames displaying the baby’s sonogram, crystal vases brimming with fresh blooms, or vintage silver pieces that catch the light magnificently.
Your decorative accents should tell a cohesive story. Layer in elements at varying heights—perhaps a delicate birdcage, mercury glass votives, or porcelain figurines that whisper sophistication.
Fabric swags in silk or organza draped along the table’s edge add theatrical dimension.
Don’t overlook the power of personalized touches: monogrammed napkins, custom signage in elegant calligraphy, or heirloom items from your own childhood.
These intimate details transform your display into something deeply meaningful. Each prop you select should serve a purpose, contributing to the overall narrative you’re crafting for this cherished celebration.
Adding Personalized Touches and Custom Signage

You’ll elevate your dessert table from beautiful to breathtaking when you incorporate bespoke elements that celebrate the guest of honor by name. A handcrafted name banner, whether fashioned from gilded letters, cascading florals, or lustrous fabric swags, serves as a magnificent focal point that draws the eye and announces the celebration’s star.
Strategic placement of themed signage—from ornate menu cards to whimsical directional signs—transforms your sweet spread into a cohesive theatrical presentation worthy of the grandest occasion.
DIY Name Banner Ideas
- Velvet ribbon letters strung on gold-leafed twine for sumptuous texture
- Pressed flower resin circles with hand-calligraphed initials
- Laser-cut wooden letters painted in your palette’s softest hue
- Silk fabric pennants embroidered with metallic thread detailing
You’ll want to position your banner at varying heights behind your dessert display, creating dimensional drama.
Layer it against cascading greenery or sheer fabric backdrops. Each letter becomes a keepsake, later adorning the nursery walls with cherished memories.
Themed Signage Display Tips
Thoughtfully curated signage transforms your dessert table from a simple spread into an immersive experience that tells your celebration’s unique story. You’ll want to select signage materials that complement your aesthetic—acrylic exudes modern sophistication, while hand-lettered wood whispers rustic charm.
| Sign Type | Signage Materials | Best Font Choices |
|---|---|---|
| Welcome Display | Acrylic or Mirror | Elegant Script |
| Dessert Labels | Linen Cardstock | Modern Serif |
| Quote Cards | Handmade Paper | Whimsical Calligraphy |
Your font choices should echo the invitation suite, creating visual continuity that guests instinctively recognize. Layer signs at varying heights using ornate easels or delicate stands. Consider incorporating the baby’s name or meaningful quotes that resonate with the parents-to-be. Each element you place becomes a love note to this precious milestone.
Styling Tips for Picture-Perfect Presentation

When every element converges with intention, your dessert table transforms from a simple display into a breathtaking visual masterpiece worthy of the most discerning guests.
You’ll want to embrace current dessert table trends while curating your styling essentials with theatrical precision.
Consider these intimate details that elevate your presentation:
- Layered heights – Create dramatic dimension using cake stands, pedestals, and risers at varying levels
- Cohesive color story – Select three complementary tones that whisper elegance throughout every confection
- Textural contrast – Pair smooth fondant with ruffled linens and crystalline accents
- Negative space – Allow breathing room between items so each treat commands attention
You’re crafting an experience, not merely arranging sweets.
Position your showstopper cake off-center for visual intrigue, then let smaller confections cascade outward like precious jewels. This deliberate asymmetry draws your guests’ eyes across the entire tableau.
Essential Supplies and Budget-Friendly Alternatives

Five essential categories anchor every stunning dessert table: display pieces, linens, serving ware, decorative accents, and signage. You’ll find that investing in quality essential tools creates a foundation you’ll treasure for years, while strategic swaps keep your vision intact without draining your wallet.
| Premium Choice | Budget Friendly Supplies |
|---|---|
| Crystal cake stands | Thrifted glass candleholders with plates |
| Silk floral arrangements | Dollar store blooms elevated with ribbon |
| Custom acrylic signage | Hand-lettered cardstock in elegant frames |
Consider renting statement pieces rather than purchasing them outright—you’ll achieve that coveted editorial aesthetic while maintaining financial grace. Your local craft store becomes a treasure trove when you approach it with discerning eyes; wooden crates transform into rustic risers, and simple glass vessels become luminous when filled with fairy lights. The secret lies in layering textures and heights thoughtfully.
Frequently Asked Questions
How Far in Advance Should I Set up the Dessert Table Before Guests Arrive?
You’ll want to begin your setup schedule 1-2 hours before guests arrive. These timing tips guarantee your confections stay fresh while giving you precious moments to perfect every exquisite detail and create that breathtaking first impression.
How Do I Keep Desserts Fresh if the Baby Shower Is Outdoors?
You’ll master keeping desserts cool by nestling treats on ice-lined platters beneath elegant protective coverings—think sheer organza cloches or crystal domes. These exquisite touches shield your confections from sun and insects while maintaining that picture-perfect presentation.
How Many Dessert Portions Should I Plan per Guest Attending?
You’ll want to plan 3-5 portion estimates per guest, darling, ensuring everyone indulges beautifully. Consider guest preferences carefully—some adore chocolate truffles while others crave delicate macarons. This thoughtful abundance creates an irresistibly lavish dessert experience together.
Can I Set up the Dessert Table the Night Before the Shower?
You can absolutely begin setting up your dessert presentation the night before! Cover delicate treats, refrigerate perishables, and drape your tablescape with luxurious linens. You’ll awaken to a breathtaking display that’s nearly complete.
What’s the Best Way to Handle Guests With Food Allergies?
Did you know 32 million Americans have food allergies? You’ll want to prioritize guest communication by sending elegant inquiry cards beforehand, then display exquisite labels beside each confection, ensuring every beloved attendee indulges safely and splendidly.
Final Thoughts
You’ve now mastered the art of transforming a simple table into a theatrical stage where sugar becomes symbolism—each tier representing the layers of love surrounding this new chapter. Your dessert display isn’t merely confection; it’s a crystalline promise of sweetness yet to come. With meticulous attention to every gilded detail and thoughtfully curated element, you’ll create an unforgettable tableau that celebrates life’s most precious gift in exquisite style.
Share On Pinterest!


Related Posts
Birthday Dinner Ideas: 25+ Stunning Ways to Celebrate That Feel Lavish (On Any Budget)
Last updated: February 2026 Last year, I planned a birthday dinner for my best friend with exactly $87 and a dream. The table had flickering candles,…
 Feb 14, 2026
15 Creative Anniversary Party Themes
Last updated: March 2026 Need fresh anniversary party ideas that won't drain your wallet? These 15 creative themes will transform your celebration into something unforgettable.
Mar 12, 2026
Pastel Color Birthday Party Ideas: 25+ Dreamy Ways to Celebrate in Soft, Stunning Style
Last updated: February 2026 Picture this: your guests walk through the door and immediately gasp. The room is bathed in soft lavender, blush pink, and the…
Feb 16, 2026
15 Gold Anniversary (50TH) Celebration Ideas
Last updated: March 2026 One golden milestone deserves an unforgettable celebration—discover creative ways to honor 50 years of love without breaking the bank.
Mar 12, 2026