You’re about to transform your Valentine’s Day photos from ordinary to absolutely breathtaking. With the right backdrop, you’ll create images that command attention and evoke pure romance.
Whether you’re drawn to cascading paper flowers, shimmering fairy lights, or dramatic balloon installations, these DIY creations deliver theatrical elegance without the designer price tag.
The secret lies in layering textures and mastering placement—and what you’ll discover next will change everything.
Key Takeaways
- Create a heart-shaped balloon wall using graduated sizes in romantic colors like deep burgundy, blush pink, and metallic gold accents.
- Build a cascading paper flower installation with blooms ranging from 3 to 18 inches arranged in a crimson-to-pink gradient.
- Design a romantic streamer curtain backdrop mixing crepe paper with metallic foil and soft backlighting for ethereal effects.
- Ensure your backdrop measures at least 6×8 feet to provide full coverage and ample space for dramatic photography.
- Weave fairy lights throughout your backdrop and layer multiple light sources to create depth and magical ambiance.
Heart-Shaped Balloon Wall Display

A stunning heart-shaped balloon wall transforms any space into a romantic masterpiece that’ll leave your guests breathless.
Your balloon color choices set the entire mood. Consider deep burgundy paired with blush pink for sultry sophistication, or opt for champagne gold mixed with crisp white for timeless elegance.
Don’t shy away from dramatic ombré effects that cascade from passionate red to soft rose.
When it comes to balloon arrangement tips, start by sketching your heart outline on the wall using painter’s tape. Work from the outside edges inward, securing balloons in graduated sizes for dimensional depth.
Layer matte and glossy finishes to create visual intrigue that catches light beautifully.
You’ll want to cluster smaller balloons near the heart’s curves while positioning larger ones at the center. Add scattered metallic accents throughout for that theatrical sparkle.
This showstopping backdrop creates the perfect intimate setting for capturing cherished Valentine’s moments together.
Cascading Paper Flower Installation

Transform your Valentine’s celebration into a breathtaking spectacle with a cascading paper flower installation that commands attention from every angle.
You’ll want to select varying paper flower sizes—from dramatic dinner-plate blooms to delicate accent petals—and arrange them in a romantic color gradient that flows from deep crimson to blush pink.
Master secure hanging techniques using clear fishing line or invisible thread to create the illusion that your flowers are floating effortlessly through the air.
Choosing Paper Flower Sizes
Selecting the right mix of paper flower sizes creates the dramatic visual impact that transforms a simple wall into a breathtaking cascading installation.
You’ll want to vary your paper flower dimensions strategically—place oversized blooms measuring 12 to 18 inches as your statement pieces, then layer medium flowers between 6 and 10 inches to build depth.
Tuck smaller 3-inch accent blooms throughout to fill gaps and add intricate detail.
Consider your flower petal shapes when mixing sizes. Pair voluptuous roses with delicate ranunculus and dramatic dahlias.
This combination creates romantic texture that draws the eye upward and outward.
For maximum allure, graduate your largest flowers along the top corners, letting them sweep diagonally downward.
This arrangement mimics nature’s organic flow while delivering the theatrical elegance your Valentine’s celebration deserves.
Color Gradient Arrangements
Color gradient arrangements elevate your cascading installation from stunning to absolutely show-stopping, and you’ll achieve this effect by strategically positioning hues that flow seamlessly into one another.
Your gradient color palettes should progress from deep burgundy at the top, melting into romantic blush, then whisper into creamy ivory at the bottom.
Master color blending techniques by placing intermediary shades between your primary tones. Position coral blooms where red meets pink, creating that irresistible visual flow that draws the eye downward like a waterfall of petals.
You’re crafting more than a backdrop—you’re designing an intimate experience.
Cluster three to five flowers of each shade together before shifting, preventing a scattered appearance. This deliberate placement creates dramatic depth that’ll make your Valentine’s celebration feel like a couture fashion moment frozen in time.
Secure Hanging Techniques
Once you’ve perfected your gradient arrangement, you’ll need hanging methods that showcase your masterpiece without risking a mid-party collapse. Secure mounting transforms your creation into a breathtaking focal point that commands attention throughout your celebration.
| Mounting Method | Best For | Display Stability |
|---|---|---|
| Command strips | Lightweight blooms | High |
| Fishing line grid | Floating effect | Medium-high |
| Dowel rod system | Heavy installations | Excellent |
| Tension rods | Doorway displays | Very high |
You’ll want to test your installation’s weight capacity before your guests arrive. Create invisible support by weaving clear fishing line through your arrangement, anchoring each section to ceiling hooks or a sturdy frame. This theatrical approach guarantees your cascading flowers appear to float effortlessly while maintaining absolute security.
Romantic Streamer Curtain Backdrop

When you’re craving a backdrop that commands attention without demanding hours of assembly, the romantic streamer curtain delivers theatrical impact with minimal effort.
Select your streamer colors deliberately—deep burgundy and blush create sultry sophistication, while crimson and gold evoke passionate opulence. Cut strips to your desired curtain length, allowing them to pool dramatically on the floor or hover just above for a cleaner silhouette.
Attach streamers to a dowel rod or tension rod, layering textures by mixing crepe paper with metallic foil varieties. You’ll create dimension by varying the density—cluster them tightly at the center and let them breathe toward the edges.
This backdrop transforms any corner into an intimate portrait studio. Position soft lighting behind the streamers to achieve an ethereal glow that wraps your subjects in warmth.
The gentle movement catches light beautifully, adding living energy to every photograph you capture.
Rustic Love Letter Board Setup

Trading ethereal movement for vintage charm, the rustic love letter board setup brings timeless romance to your Valentine’s celebration with handwritten allure.
You’ll transform weathered wood frames and antique letter boards into declarations of devotion that photograph beautifully. These rustic decorations whisper secrets of old-world courtship while commanding attention in every frame.
Create Your Love Letter Display:
- Source a vintage wooden frame or distressed peg board as your foundation
- Arrange felt letters spelling intimate messages, song lyrics, or your love letter excerpts
- Weave dried eucalyptus, burgundy roses, and twine throughout the borders
- Add flickering candles and aged books for dimensional storytelling
Position yourself before this theatrical arrangement, letting warm ambient lighting caress every curve. The contrast between raw wood textures and your polished presence creates magnetic visual tension.
This setup doesn’t just capture photos—it preserves the sacred language of lovers, frozen in time’s tender embrace.
Tissue Paper Pom Pom Arrangement

You’ll transform your Valentine’s backdrop into a stunning theatrical display when you master the art of tissue paper pom poms in carefully curated color combinations.
Select rich jewel tones like deep burgundy paired with blush pink and metallic gold to create an opulent, eye-catching palette that commands attention.
Once you’ve crafted your pom poms, strategic hanging techniques at varying heights will add dramatic dimension and glamorous depth to your romantic setting.
Choosing Color Combinations
Although tissue paper pom poms offer endless creative possibilities, the magic truly unfolds when you’ve mastered the art of strategic color pairing.
Understanding basic color theory transforms your backdrop from ordinary to breathtaking. Your chosen palette’s mood influence shapes the entire emotional atmosphere of your intimate celebration.
Consider these stunning combinations for maximum impact:
- Classic Romance: Deep burgundy, blush pink, and champagne gold create timeless sophistication
- Modern Drama: Hot pink, red, and black deliver bold, theatrical elegance
- Soft Whisper: Lavender, dusty rose, and ivory evoke tender intimacy
- Passionate Statement: Scarlet, magenta, and touches of metallic copper ignite fiery passion
You’ll want to vary your pom pom sizes within each color for dimensional richness that photographs beautifully.
Hanging and Display Tips
| Display Ideas | Romantic Effect |
|---|---|
| Ceiling cascade | Dreamy, floating ambiance |
| Ombré wall arrangement | Sophisticated gradient allure |
| Corner cluster grouping | Cozy, intimate focal point |
| Chandelier integration | Opulent, theatrical drama |
| Layered backdrop tiers | Dimensional photo-ready luxury |
You’ll want to secure each pom pom with clear fishing line for an ethereal, suspended illusion. Stagger your placement deliberately—asymmetry whispers sophistication. Position your largest pieces centrally, letting smaller blooms dance gracefully toward the edges.
DIY Photo Booth Frame With Hearts

When you’re ready to transform your Valentine’s celebration into a showstopping affair, a custom photo booth frame adorned with cascading hearts delivers instant glamour with minimal effort. Your heart frame becomes the centerpiece where romance meets artistry, creating intimate moments worth capturing.
Gather these essentials to craft your masterpiece:
- Select a large foam board or ornate picture frame as your foundation.
- Cut dimensional hearts from velvet, metallic cardstock, or rose petals.
- Attach hearts in cascading arrangements using fishing line for floating elegance.
- Position strategic lighting to cast dramatic shadows.
Elevate your creation with coordinating photo props—think feathered boas, vintage love letters, or champagne flutes. The theatrical effect draws couples into its embrace, encouraging playful poses and stolen kisses.
Mount your frame at eye level against a complementary backdrop, ensuring every snapshot radiates the passionate energy your celebration deserves.
Ombre Rose Wall Creation

You’ll transform any space into a romantic masterpiece when you craft a stunning ombre rose wall that cascades from deep crimson to blush pink.
Selecting the perfect color gradients sets the foundation, but your mounting techniques and materials determine whether your creation commands attention or falls flat.
Strategic lighting elevates your rose wall from beautiful backdrop to show-stopping centerpiece that’ll make every photo unforgettable.
Choosing Rose Color Gradients
Selecting the perfect rose color gradient transforms an ordinary backdrop into a breathtaking statement piece that commands attention.
You’ll want to embrace rose hues that speak to your romantic vision. Consider these stunning gradient blending options:
- Classic Romance: Deep burgundy shifting to blush pink, then creamy white
- Passionate Drama: Black roses fading into crimson and coral
- Soft Elegance: Dusty mauve flowing into champagne and ivory
- Bold Statement: Hot pink melting into peach and soft apricot
Your gradient should flow seamlessly from darkest shades at the bottom to lighter tones ascending upward. This creates visual depth that draws the eye and photographs magnificently.
Don’t shy away from unexpected color combinations—they’ll make your backdrop unforgettable and uniquely yours.
Mounting Techniques and Materials
For material choices, consider sturdy chicken wire stretched across a wooden frame—it’s both affordable and allows effortless flower placement.
You’ll simply weave each stem through the grid, securing blooms at varying depths for dimensional allure.
Hot glue works brilliantly for artificial roses on foam core, while floral wire creates invisible support for heavier silk varieties.
Don’t overlook fabric backings like velvet or satin; they’ll catch the light gorgeously between your roses while adding that irresistible touch of romance your intimate celebration deserves.
Lighting Your Rose Wall
- Fairy light weaving – Thread warm white strands through petals for an ethereal, intimate glow that photographs magnificently.
- Uplighting drama – Position LED spots at the base, angling upward to create dimensional shadows across your ombre gradient.
- Ring light positioning – Place it directly facing your wall for flawless, even illumination during portrait sessions.
- Candlelight clusters – Arrange flameless pillars nearby for that coveted golden-hour warmth.
You’ll discover that layering multiple light sources creates depth that single-source setups simply can’t achieve.
Fairy Light Heart Backdrop

When you want to transform your Valentine’s celebration into a scene of pure romantic enchantment, a fairy light heart backdrop delivers breathtaking drama with minimal effort. Your fairy light placement determines whether you’ll achieve subtle intimacy or showstopping grandeur.
| Element | Recommendation |
|---|---|
| Light Type | Warm white LED strings |
| Heart Size | 4-6 feet for impact |
| Wire Frame | 12-gauge floral wire |
| Density | 200+ lights per heart |
| Backdrop | Black velvet fabric |
Create stunning heart shape designs by bending your wire frame first, then wrapping lights tightly around the structure. You’ll want concentrated clusters at curves for maximum luminosity. Position your masterpiece against dark fabric—this amplifies the glow and creates that coveted floating effect.
Dim surrounding lights to let your creation command attention. The result? An irresistibly romantic atmosphere that beckons lovers closer.
Crepe Paper Ruffle Wall

Cascading waves of crepe paper transform any blank wall into a breathtaking statement of theatrical romance.
You’ll create dimension and drama that photographs beautifully, capturing the essence of passionate celebration.
Master these ruffle techniques to achieve show-stopping results:
- The Gathered Twist – Pinch and twist crepe paper every two inches, securing with hot glue for voluminous texture
- The Ombré Cascade – Layer graduating shades from blush to deep burgundy, flowing downward like a waterfall
- The Spiral Rose – Roll strips into blooming rosettes, clustering them for a garden-inspired focal point
- The Pleated Fan – Accordion-fold sections and fan outward, creating architectural interest
Start from the top corner and work diagonally across your wall.
Overlap each ruffle generously to eliminate gaps.
The secret lies in varying your techniques throughout—mixing gathered sections with rosettes creates visual intrigue that draws lovers closer for intimate portrait moments.
Hanging Origami Hearts Display

Delicate origami hearts suspended at varying heights create a mesmerizing three-dimensional gallery that transforms empty air into pure romantic artistry.
You’ll master origami heart techniques that turn simple squares into sculptural declarations of love, each fold a deliberate act of devotion.
Start with paper folding essentials: crisp cardstock in deep burgundy, blush pink, and metallic rose gold. You’ll want varying sizes—from dainty two-inch hearts to dramatic six-inch showstoppers.
Thread invisible fishing line through each heart’s top crease, then attach to a gilded branch, vintage chandelier frame, or sleek copper pipe.
Stagger your hearts at different lengths, clustering some intimately close while others drift apart like whispered secrets.
Add dimension by incorporating mirrored paper hearts that catch candlelight and scatter it across your beloved’s face.
This isn’t just a backdrop—it’s a floating love letter suspended in space, waiting to embrace your most cherished moments.
Ribbon and Tulle Romantic Background

Layers of sumptuous tulle and satin ribbon cascade together to create a backdrop that whispers old Hollywood glamour while demanding center stage attention.
You’ll want to select ribbon colors that speak to your passion—deep burgundy, blush pink, or champagne gold create irresistible romantic layers.
Consider these installation tips for breathtaking results:
- Choose backdrop dimensions of at least 6×8 feet for full coverage
- Mix tulle textures—pair soft illusion tulle with crinkled varieties for depth
- Attach ribbons at varying lengths using a wooden dowel or copper pipe
- Weave fairy lights throughout for an intimate, dreamy glow
You’re crafting more than a photo backdrop; you’re building a theatrical experience.
Let the fabric pool dramatically on the floor, and don’t shy away from abundance. This is your moment to embrace extravagance and create something unforgettably romantic.
Frequently Asked Questions
How Far in Advance Should I Set up My Valentine’s Day Backdrop Before the Event?
You’ll want to set up your backdrop 1-2 days before your event. These timing considerations allow you to perfect lighting and adjust details. Follow preparation tips like testing photo angles to guarantee breathtaking, swoon-worthy moments together.
What Lighting Works Best for Photographing DIY Valentine’s Day Backdrops?
You’ll achieve breathtaking results with soft natural lighting near windows, casting romantic shadows across your backdrop. When daylight fades, layer artificial lighting using warm-toned string lights or candles to create an intimate, dramatically elegant atmosphere.
How Do I Safely Attach Backdrops to Rental Venue Walls Without Damage?
Don’t worry about losing your deposit! You’ll protect those precious walls using damage-free adhesive strips or removable tape options that hold your dramatic backdrop securely. Create that intimate, show-stopping Valentine’s moment without leaving a trace behind.
Can These Backdrop Ideas Be Adapted for Outdoor Valentine’s Day Photo Shoots?
You’ll want weather-resistant outdoor materials that withstand breezes while embracing natural lighting’s golden warmth. Pair your dramatic DIY creations with scenic backdrops—think rose gardens or twinkling cityscapes—for breathtakingly romantic, theatrical elegance that captures your intimate connection.
What Camera Settings Work Best When Shooting Against Colorful Valentine’s Day Backdrops?
Like a daguerreotype artist capturing love, you’ll want aperture settings around f/2.8-f/4 for dreamy bokeh. Keep your shutter speed at 1/125 or faster to freeze those intimate, heart-fluttering moments against your theatrical backdrop.
Final Thoughts
You’ve now got the arsenal to transform any space into a swoon-worthy photography paradise—because nothing says “I love you” quite like spending hours hot-gluing paper hearts while questioning your life choices. But darling, when you’re standing before your theatrical masterpiece of cascading florals and twinkling lights, you’ll realize the madness was worth it. Now go forth and create backdrops that’ll make Cupid himself jealous.
Share On Pinterest!


Related Posts
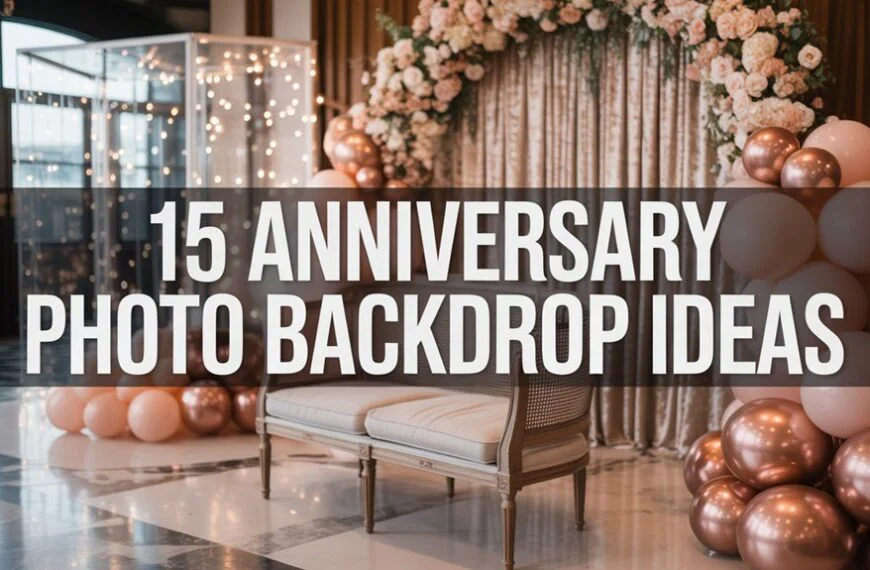
15 Anniversary Photo Backdrop Ideas
Last updated: March 2026 Get inspired by these stunning anniversary photo backdrop ideas that will transform your celebration into unforgettable memories you'll treasure.

Corporate Event Backdrop Design Ideas That Look Like a Million Bucks
Last updated: February 2026 Picture this: your boss just dropped the news that you're in charge of the next company gala, product launch, or annual conference.…

Star Birthday Party Ideas: How to Throw a Celestial Celebration That Looks Like a Million Bucks
Last updated: February 2026 Last updated: February 23, 2026 A star-themed birthday party is one of the most versatile, visually stunning themes you can pull off…

Birthday Party Ideas for Women: 30+ Stunning Celebrations She'll Never Forget
Last updated: February 2026 Let me tell you something I've learned after years of planning events on a budget: the best birthday party ideas for women…