You don’t need a designer’s budget to create a backdrop that commands attention. With your own hands and a vision, you’ll transform ordinary materials into something utterly spectacular—a stage worthy of your most significant moments.
Whether you’re drawn to the elegance of a wooden arch or the drama of cascading fabric, these six DIY projects prove that luxury isn’t bought; it’s built. The question is: which showstopper will you create?
Key Takeaways
- A classic wooden arch requires just two vertical posts and a curved header, secured with hidden brackets for a clean, elegant look.
- PVC pipe frames offer lightweight, budget-friendly construction that’s easy to assemble and can be shaped into rectangles, crescents, or hexagons.
- Rustic pallet walls need three to five heat-treated pallets, basic sanding, and support structures to create a charming backdrop.
- Copper pipe stands require no welding and pair beautifully with macramé hangings made from cotton cord using simple knotting techniques.
- Fabric canopies draped over PVC or wooden dowel frames create romantic atmospheres when anchored with weighted, concealed bases.
Classic Wooden Arch With Minimalist Appeal

Construction demands precision: two vertical posts, one curved or angular header, secured with hidden brackets.
You’re building more than structure; you’re crafting the threshold where your old life ends and your shared future begins.
Dress it with trailing florals or leave it bare.
Either choice makes a statement. The arch stands as your silent witness, elegant and unapologetic in its refined simplicity.
Romantic Floral Frame Using PVC Pipe

While wooden arches command attention through rustic gravitas, PVC pipe offers you something equally powerful: theatrical romance at a fraction of the cost.
You’ll discover PVC pipe advantages that transform budget constraints into creative liberation—lightweight construction, effortless assembly, and a pristine white canvas begging for floral drama.
Paint your frame matte white or wrap it in luxurious fabric before draping cascading blooms across every inch. Consider floral color combinations that whisper intimacy: blush peonies against burgundy dahlias, ivory roses threading through dusty eucalyptus, or passionate reds softened by champagne hydrangeas.
Connect your pipes using corner fittings to create rectangular frames, sweeping crescents, or geometric hexagons that frame your love story.
Secure your florals with zip ties hidden beneath greenery, building density at the corners while allowing the center to breathe. You’re not just building a backdrop—you’re crafting a botanical masterpiece.
Bohemian Macramé Backdrop on a Copper Stand

Transform your ceremony space into a stunning bohemian dreamscape with a handcrafted macramé backdrop suspended from gleaming copper pipes.
You’ll gather your materials—copper tubing, connectors, cotton cord, and essential knotting tools—before undertaking this show-stopping creation.
Follow our step-by-step assembly guide to construct the copper frame and weave intricate macramé patterns that’ll leave your guests utterly mesmerized.
Materials and Tools Needed
Crafting a stunning bohemian macramé backdrop on a gleaming copper stand demands materials that command attention and refuse to fade into the background.
You’ll need three-quarter-inch copper pipes, elbow connectors, and a pipe cutter—or explore budget friendly options like painted PVC for the same dramatic effect.
For your macramé masterpiece, gather 4mm natural cotton cord, measuring tape, and sharp scissors.
You’ll want approximately 200 yards of rope to create those luscious, cascading knots that’ll make guests swoon.
Don’t overlook essential safety precautions: wear gloves when cutting pipes and work in ventilated spaces.
Secure your stand with weighted bases to prevent toppling.
This isn’t just décor—it’s a declaration.
Your backdrop will whisper romance while shouting sophistication.
Assembly Step-by-Step Guide
Once you’ve gathered your materials, the real magic begins—and you’ll want to clear a spacious work area because this backdrop demands room to breathe.
Start by connecting your copper pipes into an arch or rectangular frame using elbow joints—no welding required, making this one of the most budget friendly options available.
Next, secure your horizontal dowel across the top. This becomes your macramé anchor point.
Following essential DIY backdrop tips, attach your pre-cut cord lengths using lark’s head knots, spacing them evenly for visual balance.
Now, work your chosen pattern—spiral knots create drama, while square knots deliver bohemian elegance. Let each strand cascade freely, creating that signature flowing silhouette.
Finally, add dried pampas grass or eucalyptus for an intimate, organic finishing touch.
Rustic Pallet Wall With Greenery Accents

Transform weathered wood into a showstopping ceremony statement by mastering the art of sourcing and preparing pallets that serve as your dramatic foundation.
You’ll construct a secure wall structure that commands attention while providing the perfect canvas for nature’s touch.
Crown your creation with cascading fresh greenery accents that breathe life into the rustic timber, crafting an unforgettable backdrop worthy of your grandest celebration.
Sourcing and Preparing Pallets
You’ll need between three and five wooden pallets to construct a backdrop that commands attention and sets the stage for your ceremony’s most unforgettable moments.
Your pallet sourcing journey begins at local warehouses, garden centers, or hardware stores—many give them away free. Seek heat-treated pallets marked “HT” rather than chemically treated options.
Once you’ve secured your materials, pallet preparation transforms rough lumber into a romantic canvas.
Sand every surface until splinters surrender, revealing smooth wood that whispers elegance. Inspect for protruding nails and hammer them flat or remove them entirely.
You’re creating more than a backdrop—you’re crafting the frame for your love story.
Apply a weathered gray stain or leave the natural patina for authentic rustic drama that’ll make your guests catch their breath.
Securing Your Wall Structure
Before your pallets can bloom with cascading greenery, they must stand united as an architectural statement that defies gravity and captures every guest’s gaze.
You’ll craft support structures that transform raw wood into a breathtaking monument to your love. Wall stability isn’t merely functional—it’s the invisible foundation of your romantic vision.
Essential Securing Steps:
- Connect pallets using heavy-duty metal brackets at every joint, creating an unbreakable bond.
- Anchor your structure with weighted bases or stake deeply into soft ground.
- Install diagonal cross-bracing behind the display for wind resistance.
- Test rigidity by applying firm pressure before adding any decorative elements.
Your backdrop must withstand nature’s whims and the weight of lush botanical arrangements. This fortress of reclaimed beauty will cradle your vows with unwavering strength.
Attaching Fresh Greenery
Once your pallet structure stands rock-solid, you’re ready to weave nature’s opulence through every weathered slat and rustic gap. Thread fresh foliage through openings, securing stems with floral wire twisted behind the wood. You’ll want lush cascades draping dramatically downward.
| Greenery Types | Visual Impact | Attachment Method |
|---|---|---|
| Eucalyptus | Romantic, flowing | Wire to slats |
| Italian Ruscus | Dense, elegant | Tuck into gaps |
| Smilax Vine | Wild, untamed | Weave throughout |
Layer your greenery types strategically—start with substantial branches as your foundation, then build intimacy with delicate accent pieces. Mist everything thoroughly two hours before your ceremony begins. Your beloved deserves this moment framed by living, breathing botanical splendor that whispers forever.
Modern Geometric Hexagon Display

A geometric hexagon backdrop commands attention with its striking architectural presence, transforming your ceremony space into a gallery-worthy installation.
You’ll create an unforgettable focal point where hexagon shapes intersect to frame your most intimate moment. These geometric designs deliver drama without overwhelming your venue’s natural beauty.
Building Your Statement Piece:
- Cut six equal-length wooden dowels or copper pipes, connecting them at 120-degree angles using corner brackets or welded joints.
- Scale your hexagon to stand seven feet tall for maximum visual impact behind you and your partner.
- Wrap joints with metallic tape or velvet ribbon to conceal hardware while adding opulent texture.
- Suspend the structure from a sturdy frame or anchor it with weighted bases hidden beneath fabric draping.
You’re crafting more than décor—you’re engineering the architectural embrace where your love story unfolds before those who matter most.
Dreamy Draped Fabric Canopy

While geometric structures make bold architectural statements, flowing fabric canopies transport your ceremony into pure romantic fantasy.
You’ll create an intimate cocoon where vows feel whispered just for two, surrounded by cascading waves of luxurious textile.
Select your draped colors strategically—blush silks whisper tenderness, while deep burgundies command passion.
Ivory chiffon layers create ethereal dimension that catches light magnificently.
Your canopy styles range from dramatic four-post structures with billowing panels to simple suspended swags anchored between trees.
For maximum impact, gather fabric at center points and let it waterfall outward, creating theatrical movement with every breeze.
Construct your frame using sturdy PVC pipes or wooden dowels, then attach fabric with zip ties hidden beneath decorative ribbons.
Layer sheer organza over heavier satin for depth that photographs beautifully.
This backdrop transforms any space into your private sanctuary—opulent, enveloping, unforgettable.
Frequently Asked Questions
How Far in Advance Should I Build My Ceremony Backdrop Before the Wedding?
Build your backdrop design two to three weeks before the big day—this wedding timeline sweet spot lets you perfect every stunning detail, make adjustments, and avoid last-minute stress so you’re free to savor your moment.
Can These Backdrops Withstand Outdoor Wind and Weather Conditions Safely?
You’ll need to anchor your backdrop securely for proper wind resistance and weather durability. Sandbags, stakes, and weighted bases transform your stunning creation into a steadfast sanctuary where your love story unfolds magnificently, regardless of nature’s whims.
What Tools Do Beginners Need to Build These Ceremony Backdrops?
You’ll need basic toolkits featuring a drill, saw, measuring tape, and level—essential equipment that transforms your romantic vision into reality. With these tools in hand, you’re ready to craft breathtaking, intimate backdrops worthy of your love story.
How Do I Transport a Completed Backdrop to My Venue?
You’ll want to disassemble your backdrop into manageable sections for transportation tips that actually work. Wrap each piece in plush blankets, then complete your backdrop assembly on-site for that breathtaking, show-stopping moment you’ve been dreaming of.
Are These Backdrop Materials Safe for Indoor Venues With Fire Codes?
Like a phoenix rising safely, you’ll want to verify your materials meet fire safety regulations before installation. Contact your space directly—indoor venue guidelines vary dramatically. Most require flame-retardant fabrics and certified structural elements for your breathtaking celebration.
Final Thoughts
You’ve now got the blueprint to transform your ceremony into a showstopping spectacle. Whether you’re drawn to the rustic charm of reclaimed pallets or the ethereal elegance of draped fabric, you’re killing two birds with one stone—saving money while crafting something magnificently yours. Don’t settle for ordinary when extraordinary is within your grasp. Roll up your sleeves, release your inner artist, and build the breathtaking backdrop your love story deserves.
Share On Pinterest!


Related Posts

15 Sweet Dessert Ideas for An Anniversary on a Budget
Last updated: March 2026 Perfectly romantic anniversary desserts don't require expensive ingredients—discover budget-friendly recipes that will make your celebration unforgettable.

Affordable Lighting and Ambiance Ideas For Your Anniversary
Last updated: March 2026 Just a few budget-friendly lighting tricks can transform your anniversary into pure magic—but one surprising hack changes everything.
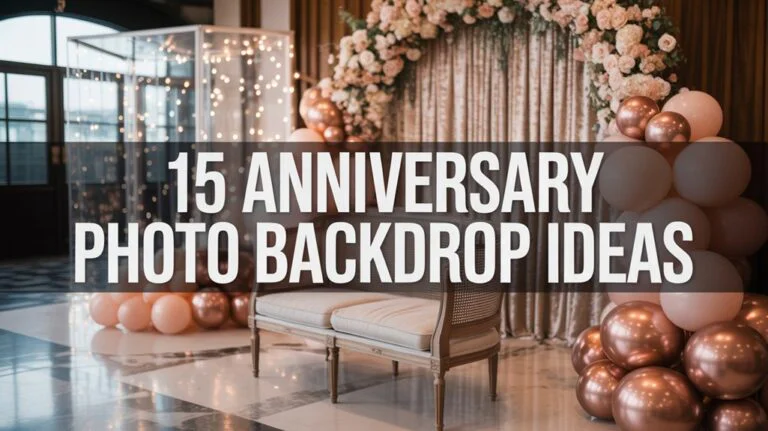
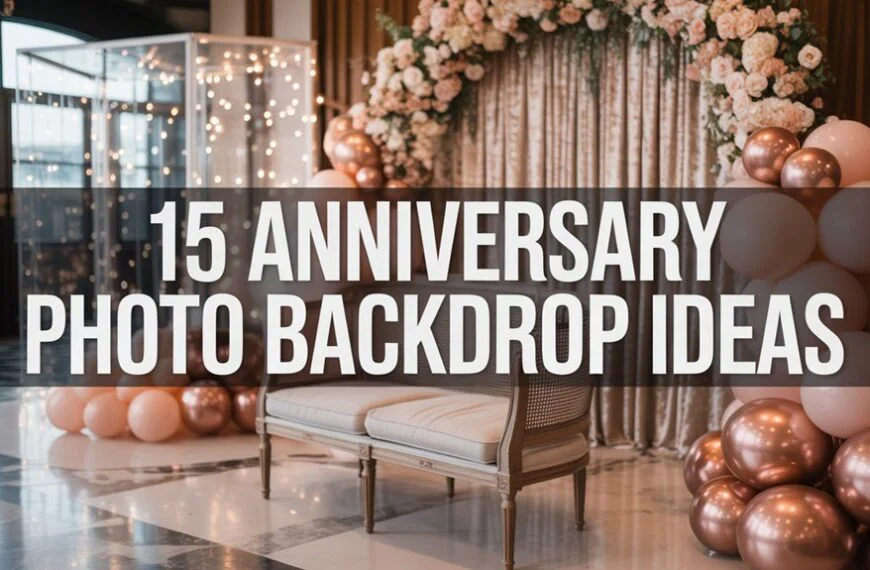
15 Anniversary Photo Backdrop Ideas
Last updated: March 2026 Get inspired by these stunning anniversary photo backdrop ideas that will transform your celebration into unforgettable memories you'll treasure.
DIY Centerpiece Ideas for an Anniversary Dinner Table
Last updated: March 2026 Stunning DIY centerpieces can transform your anniversary table into a romantic masterpiece, but one unexpected technique steals the show.